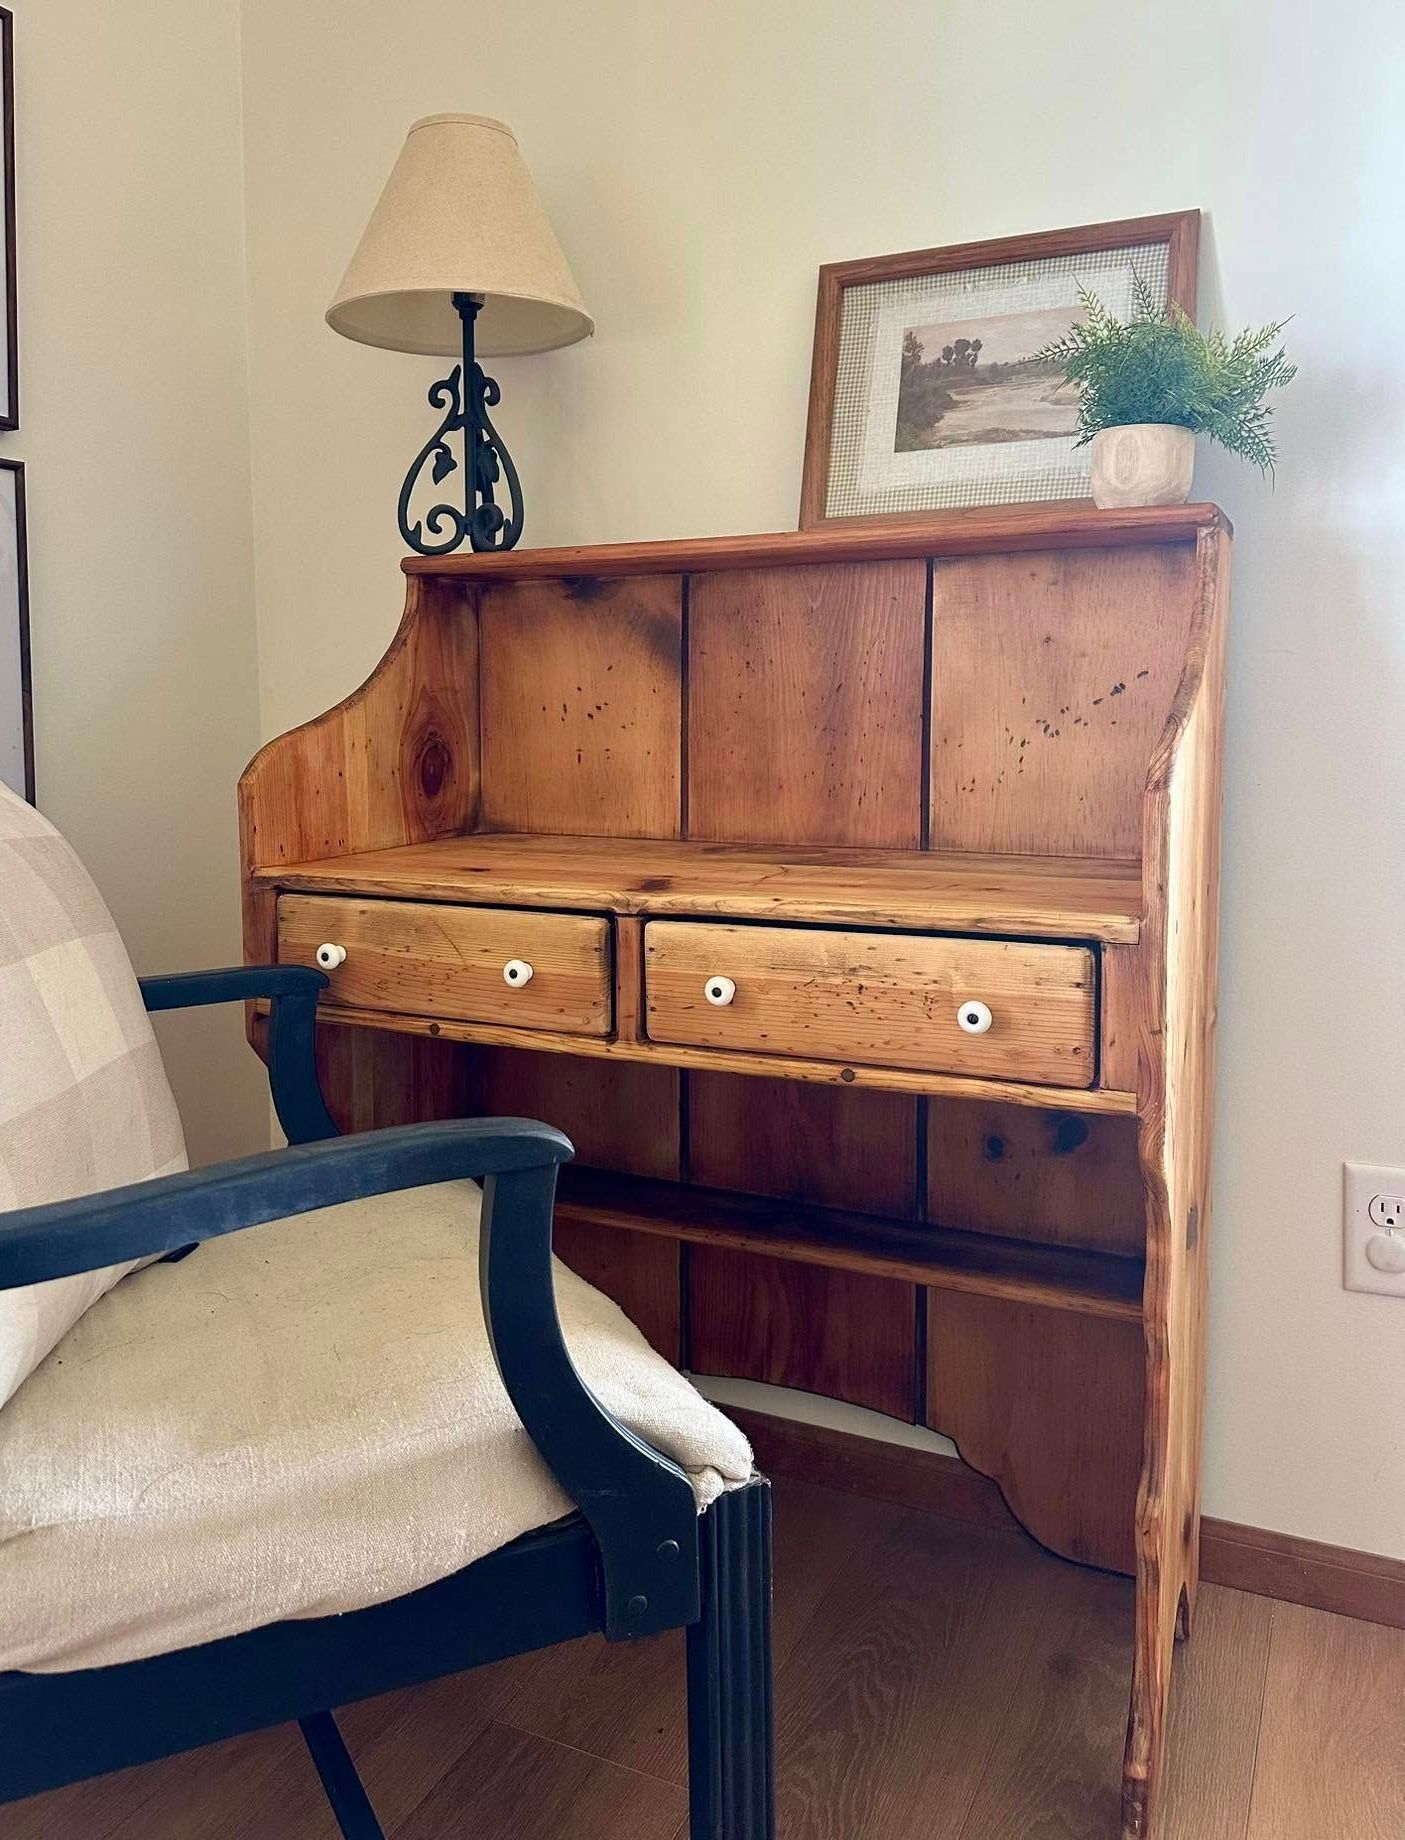
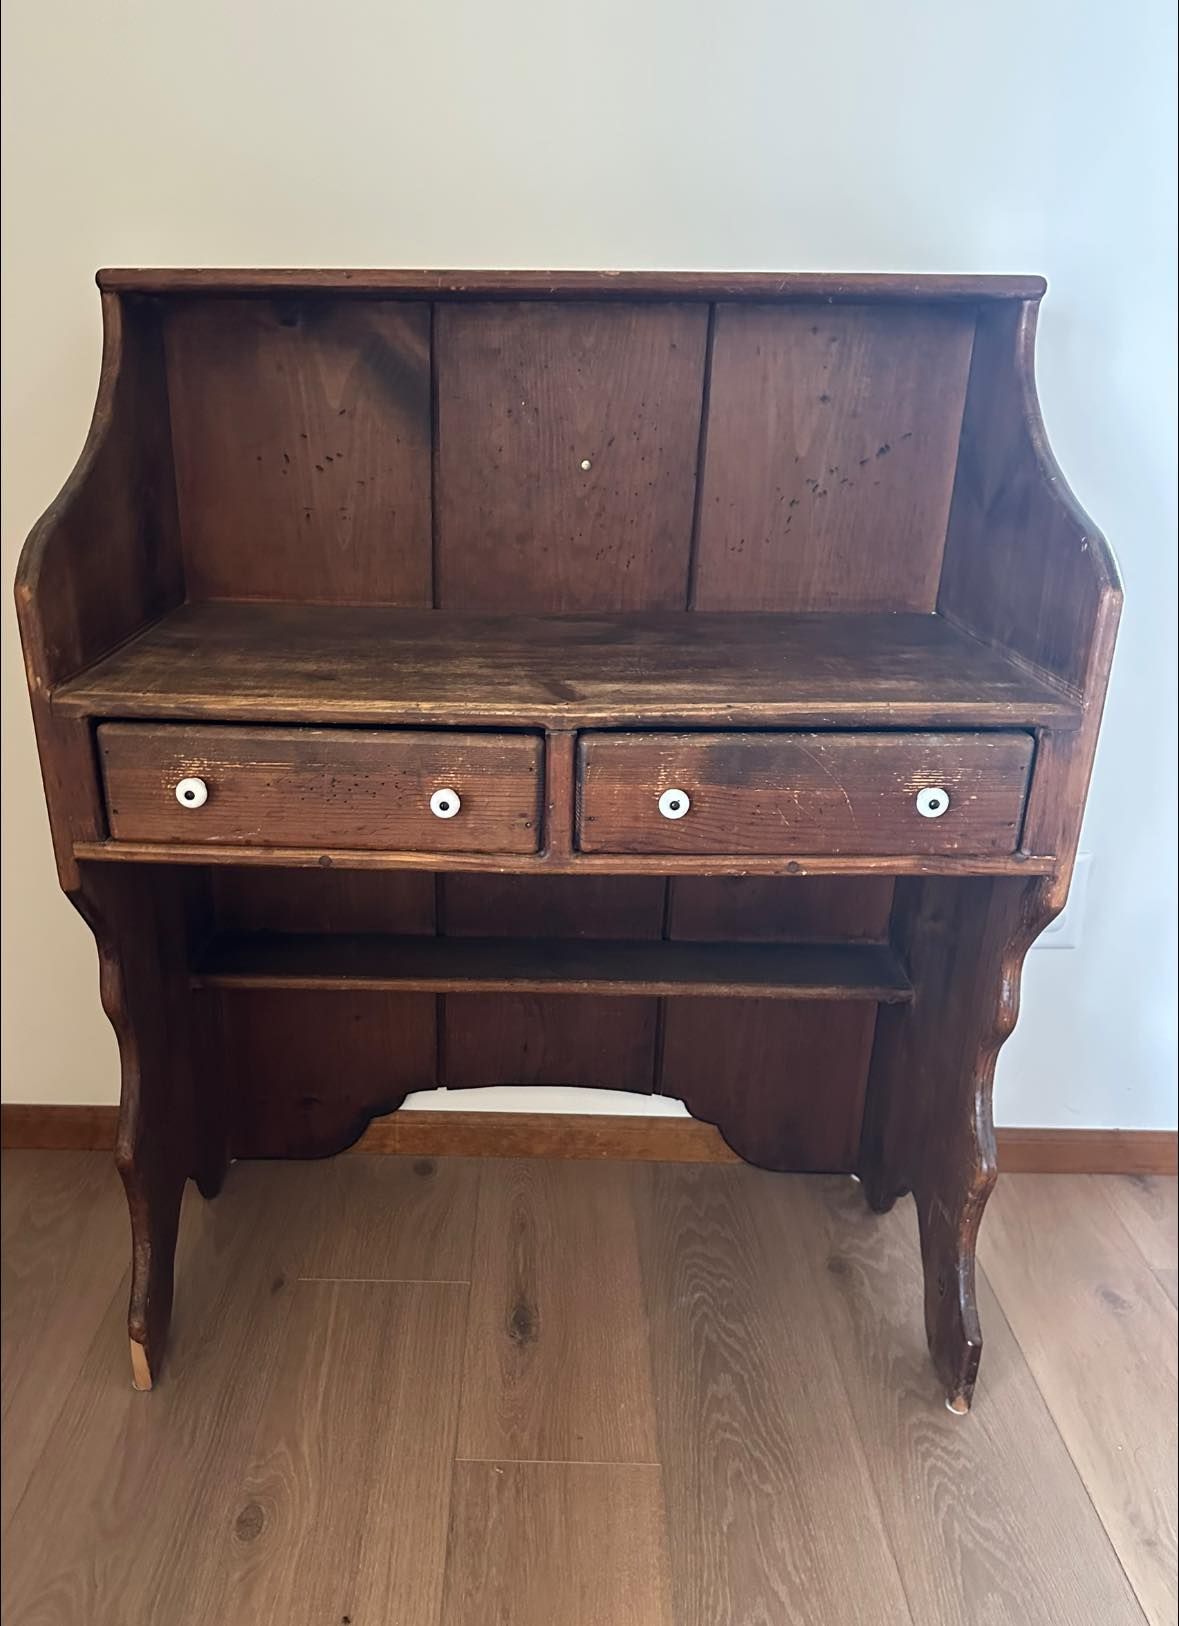
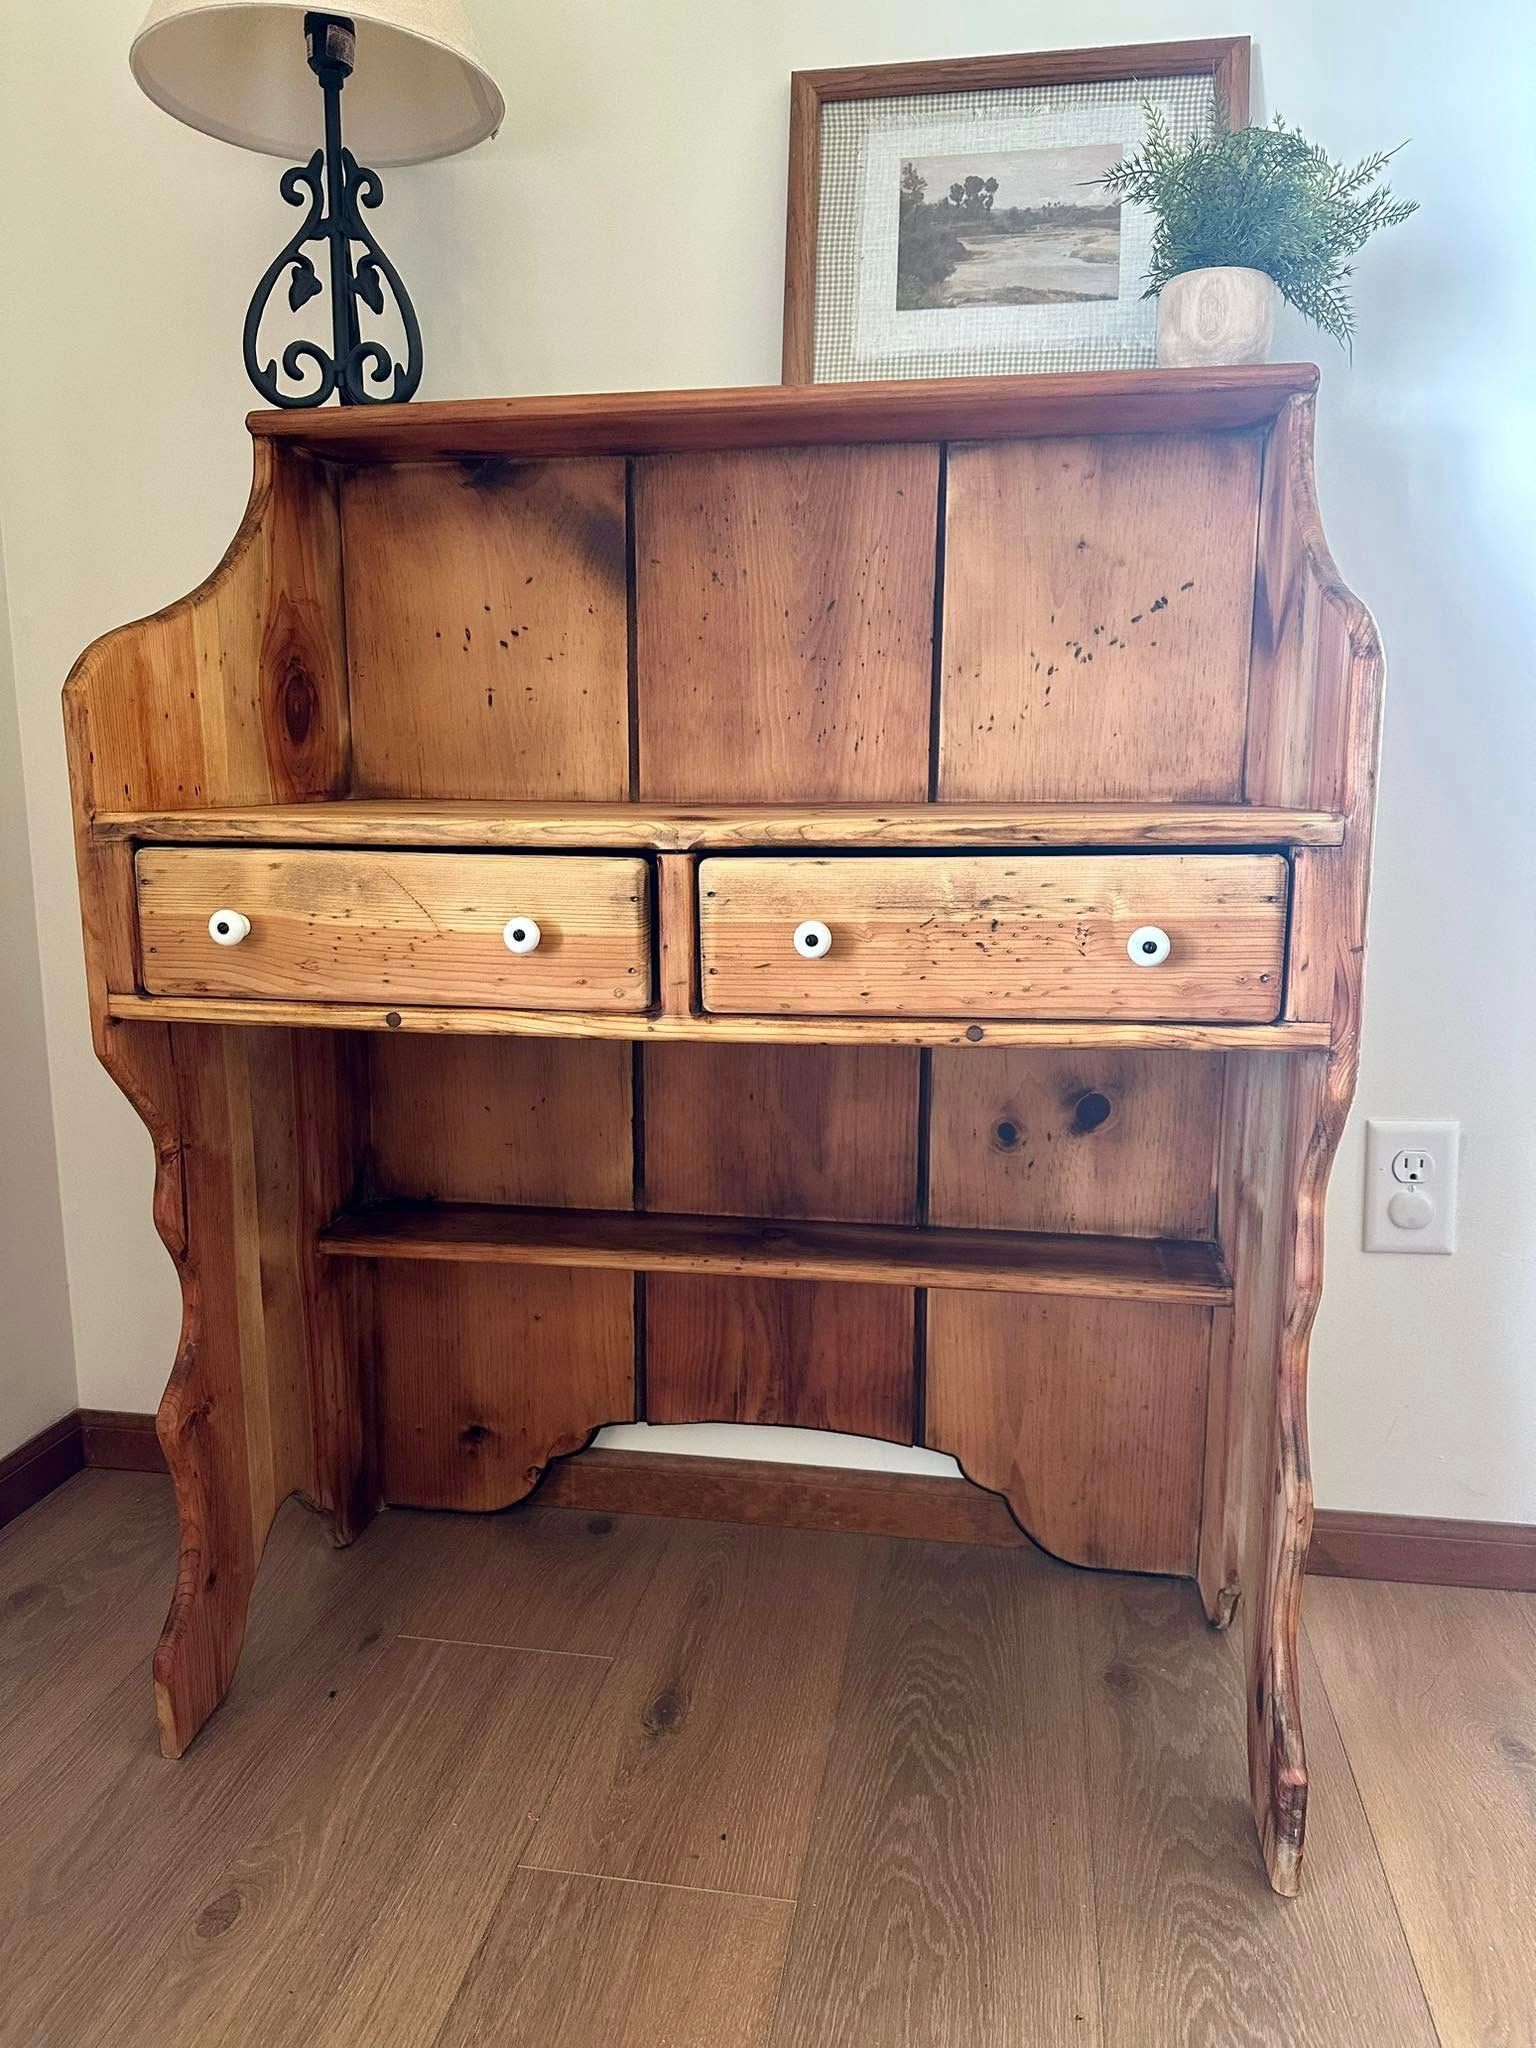
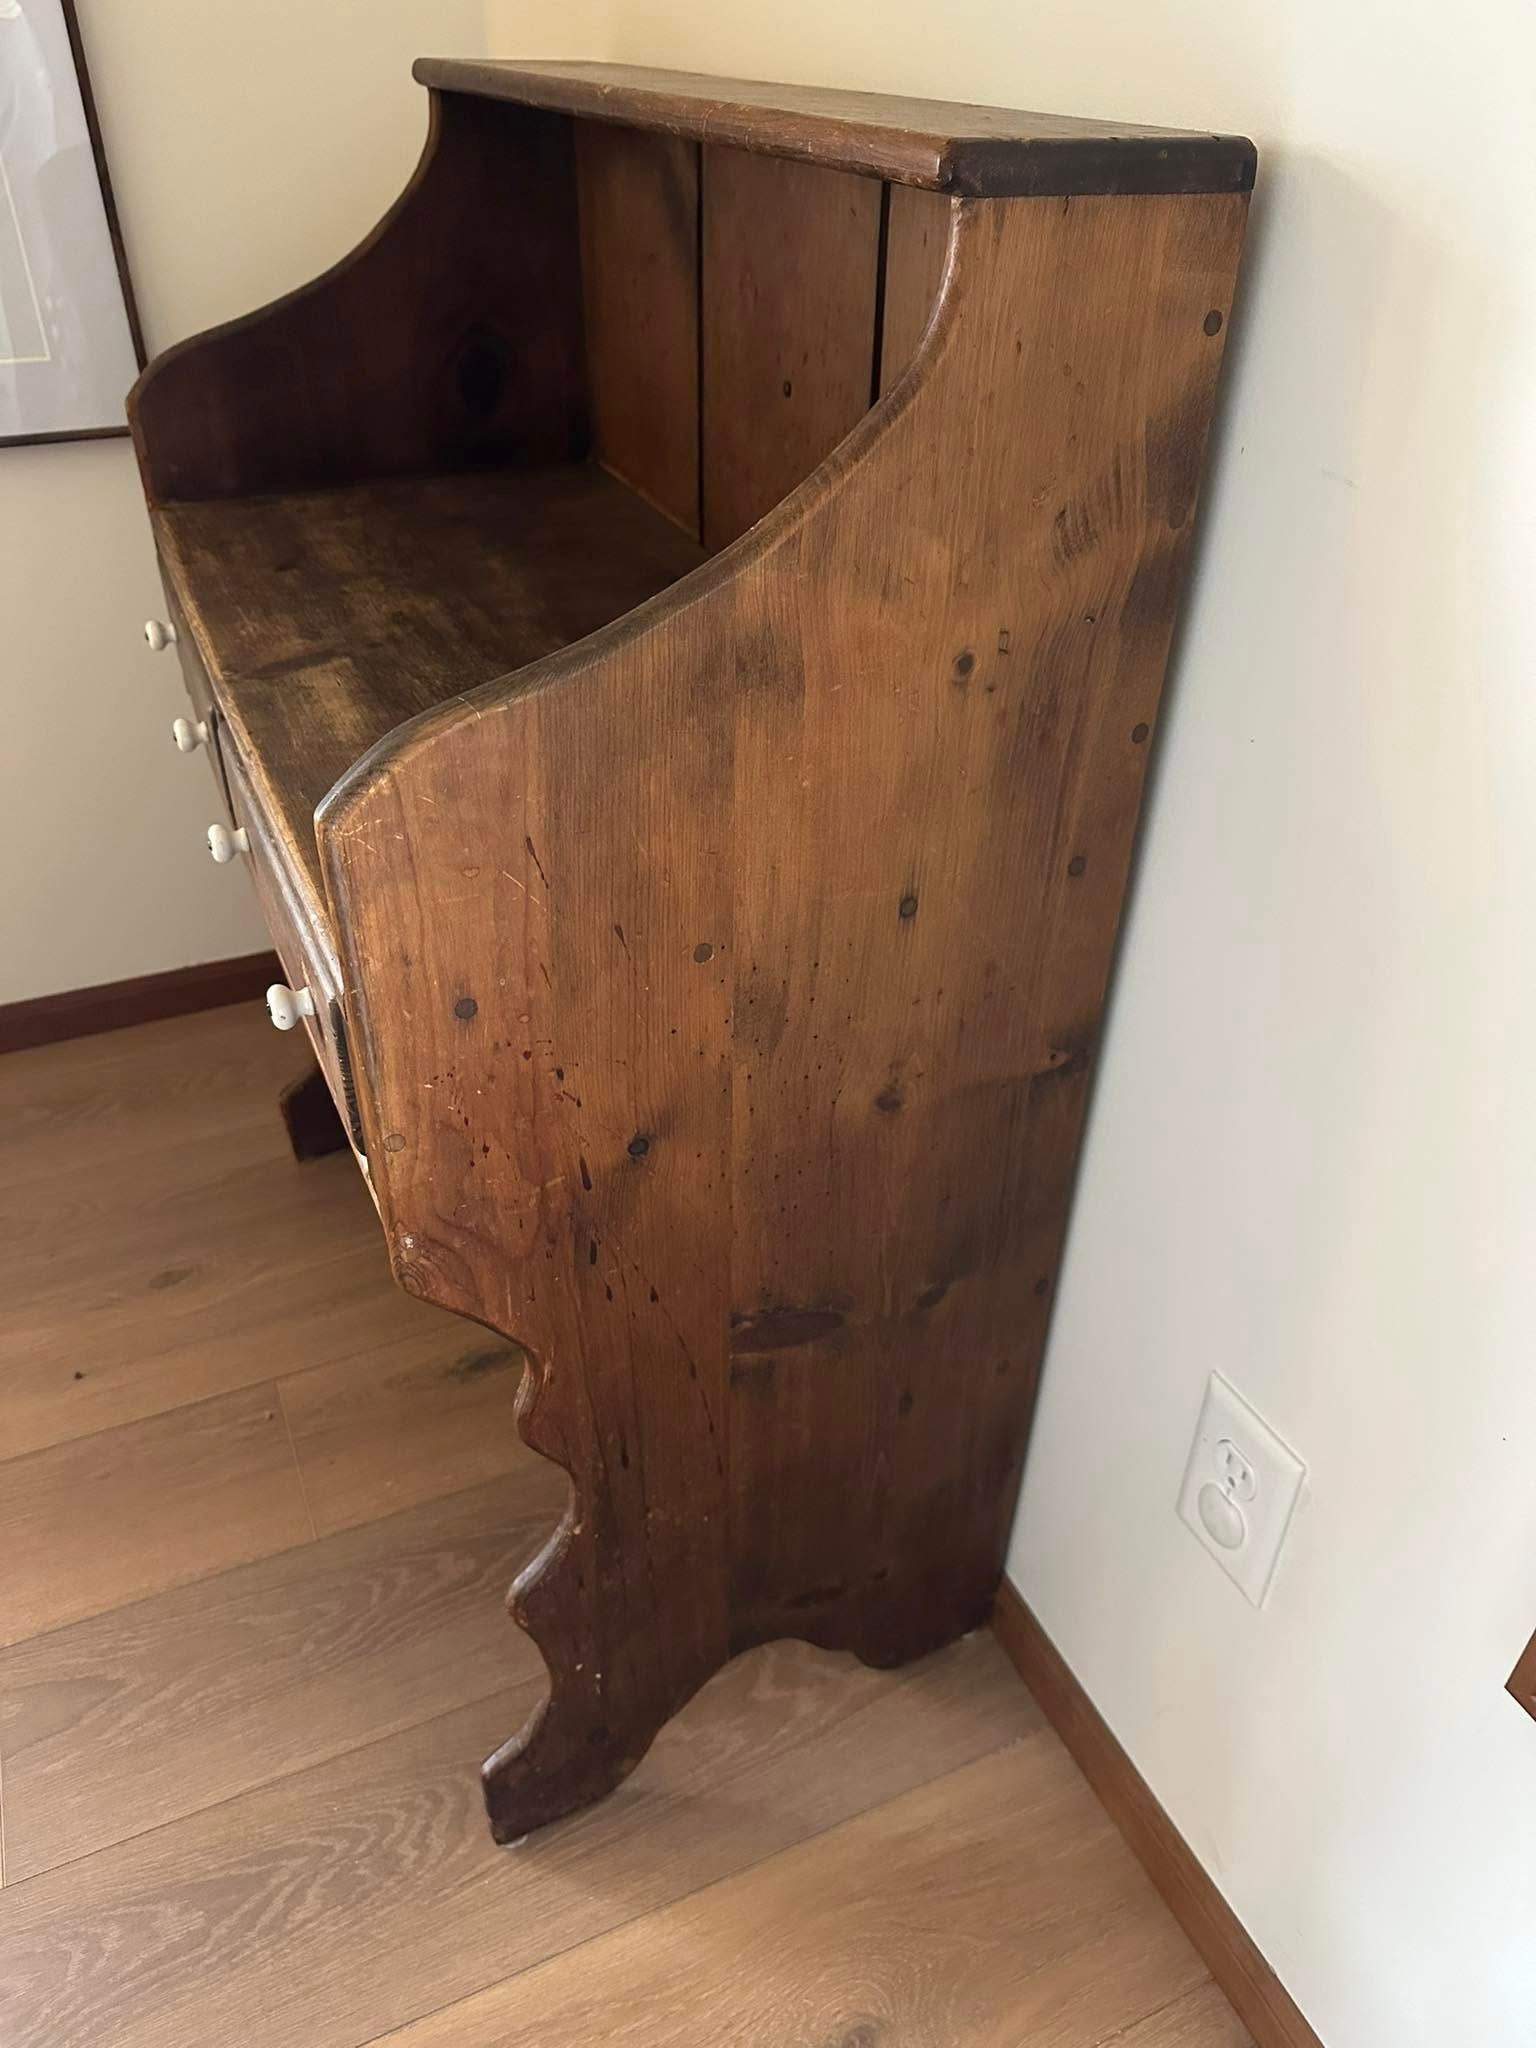
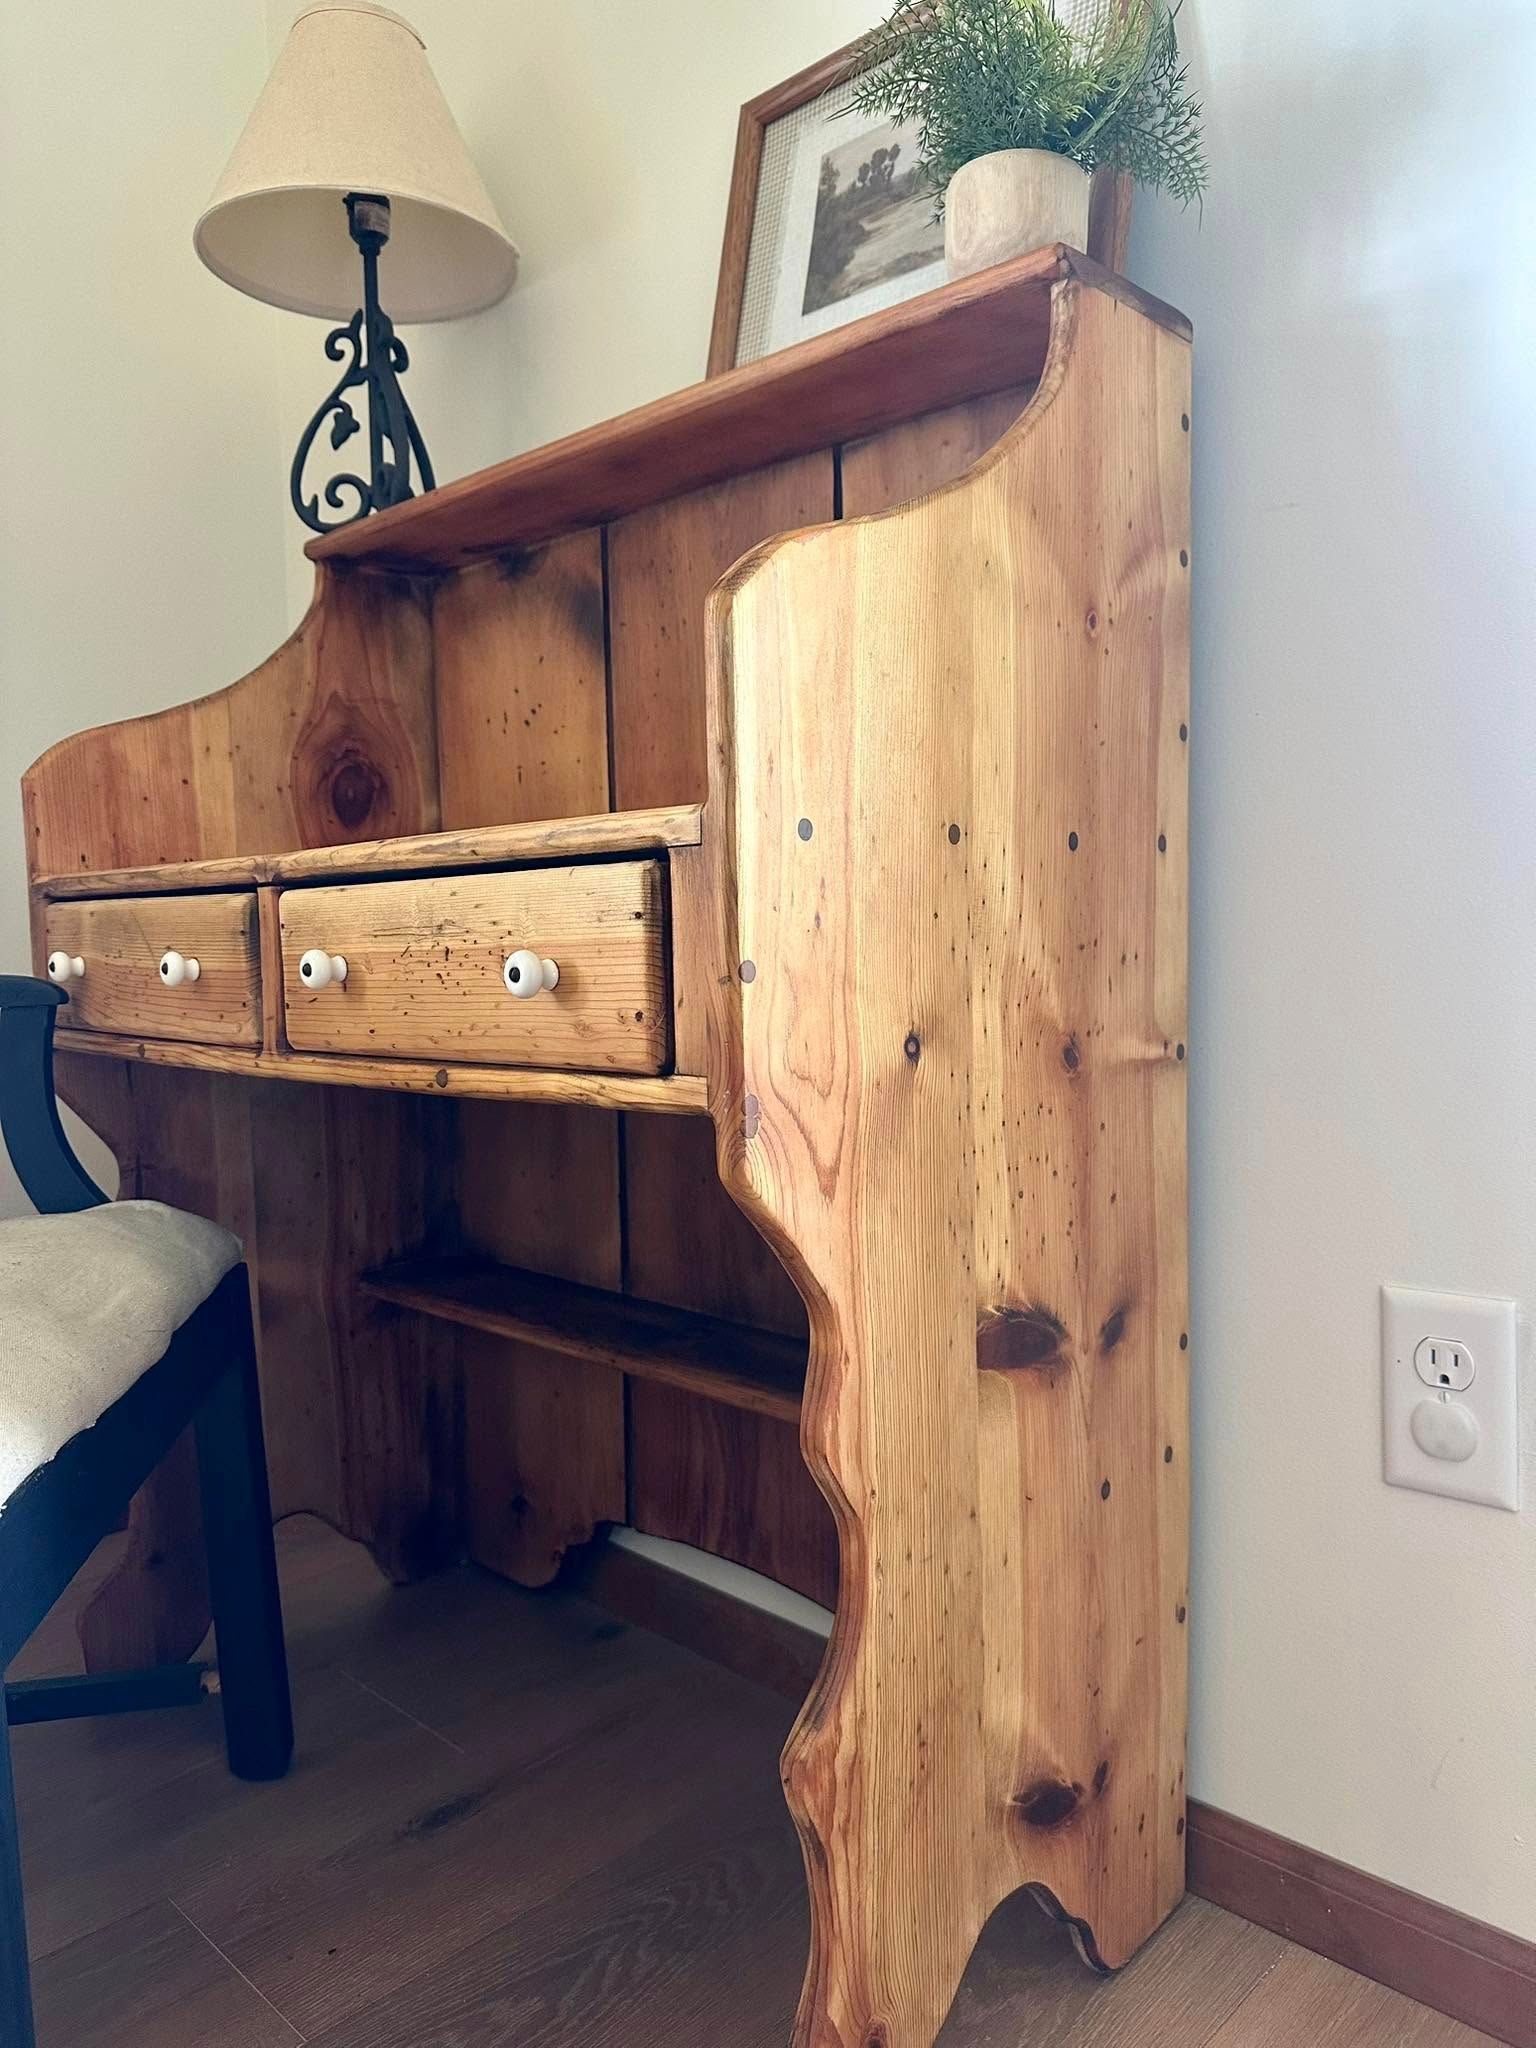
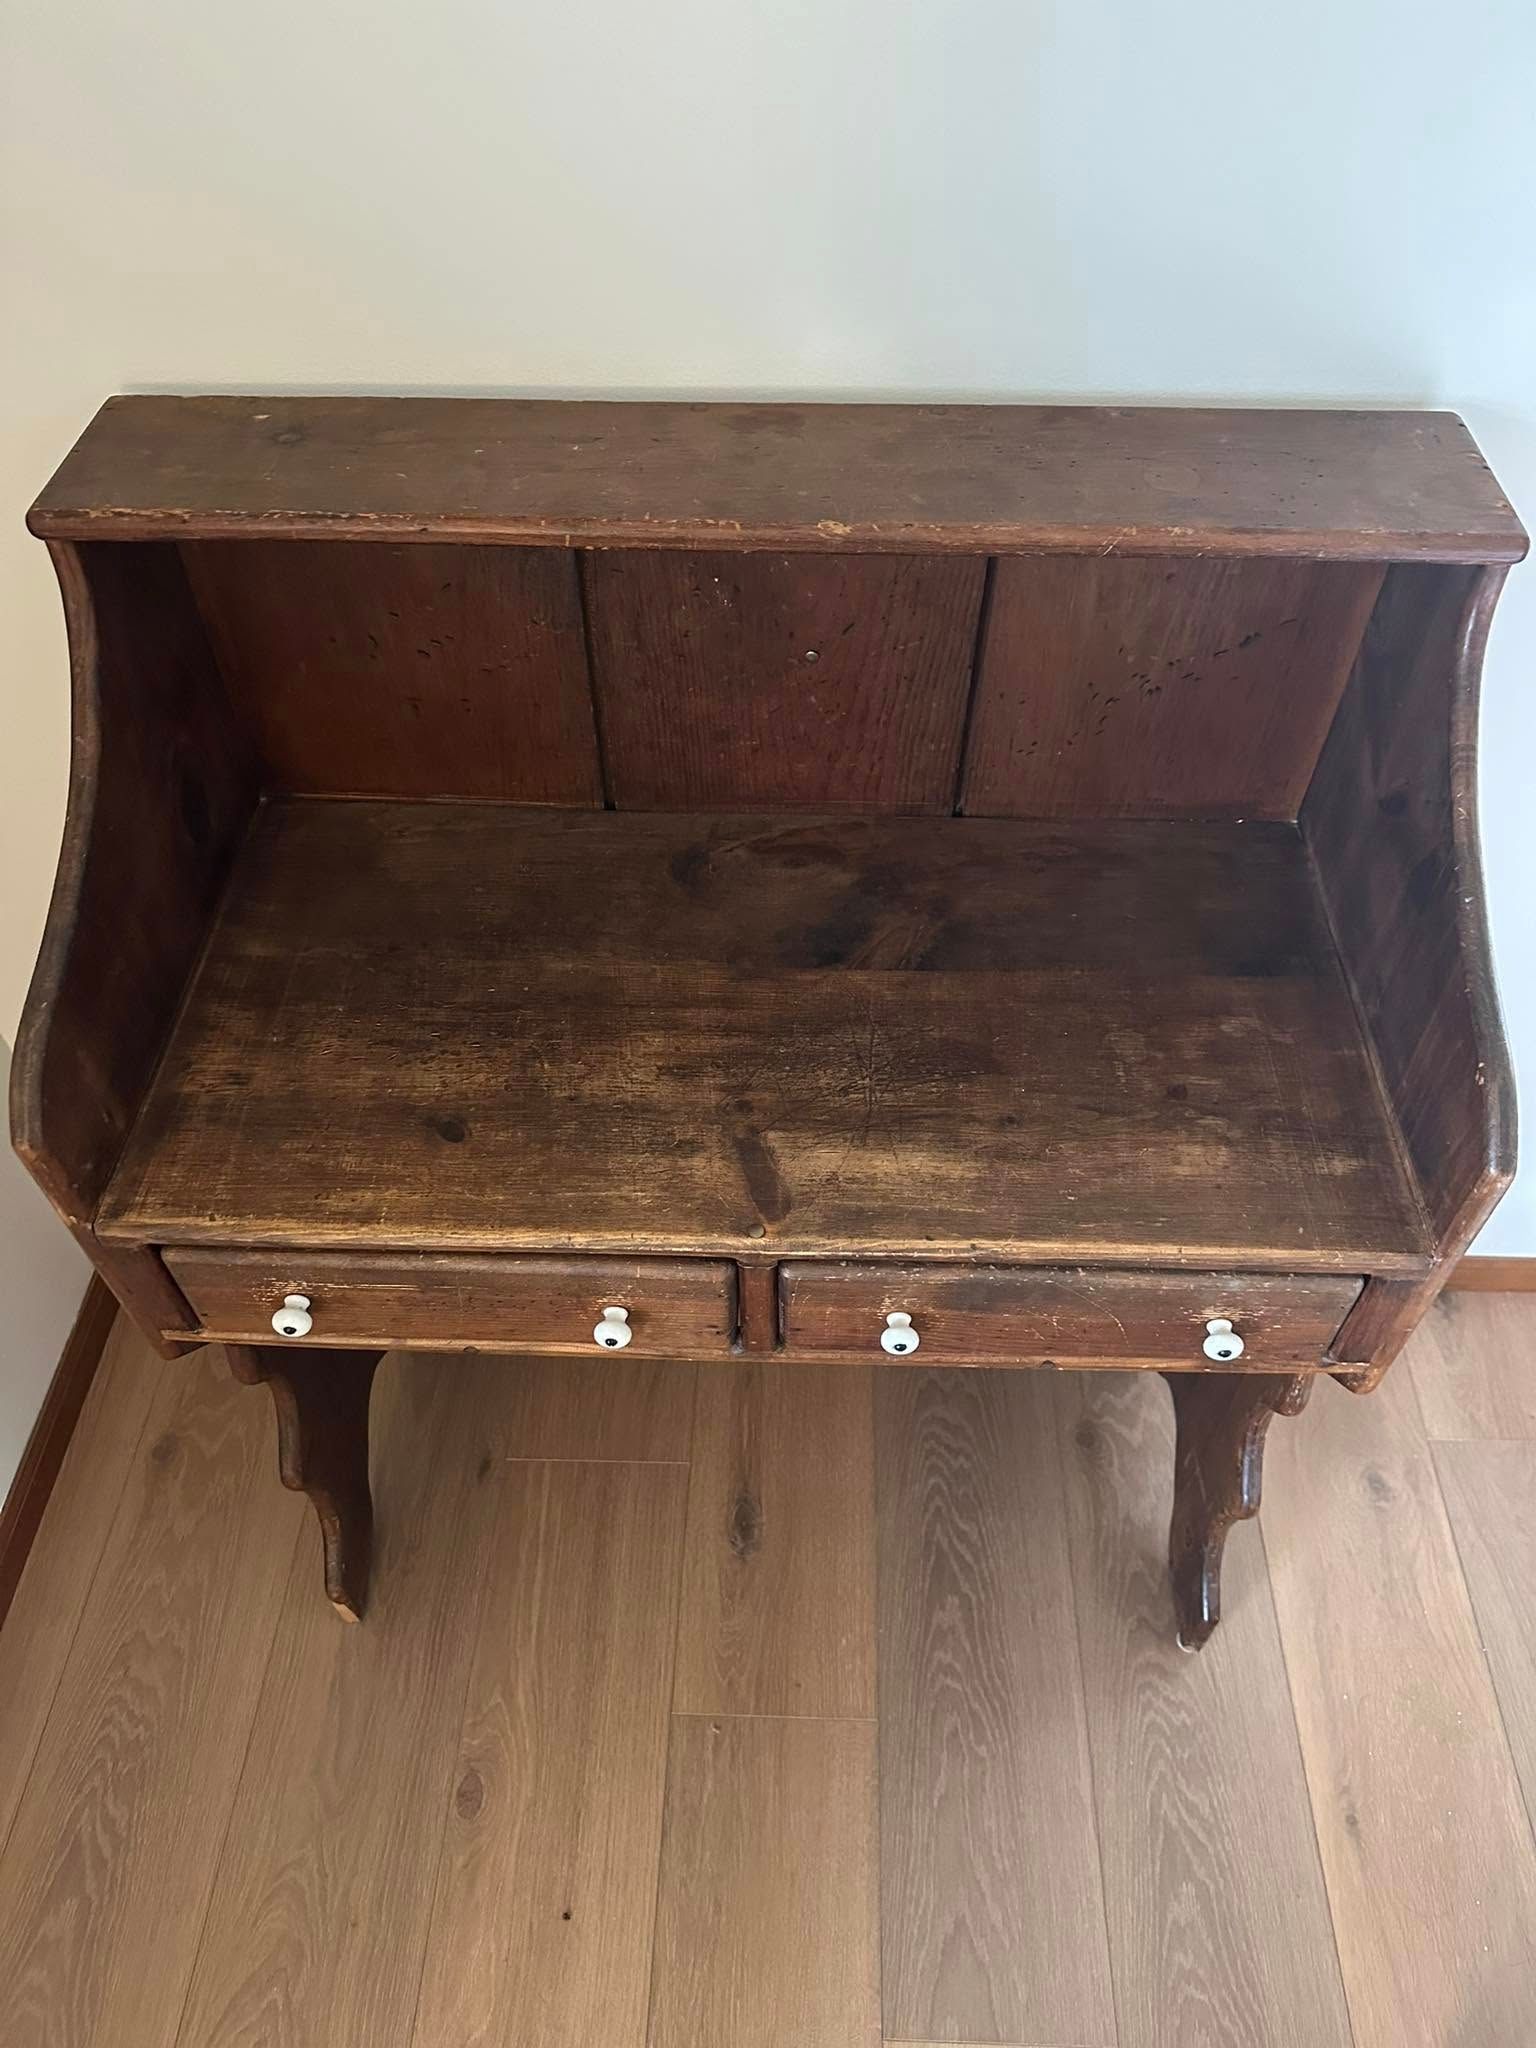
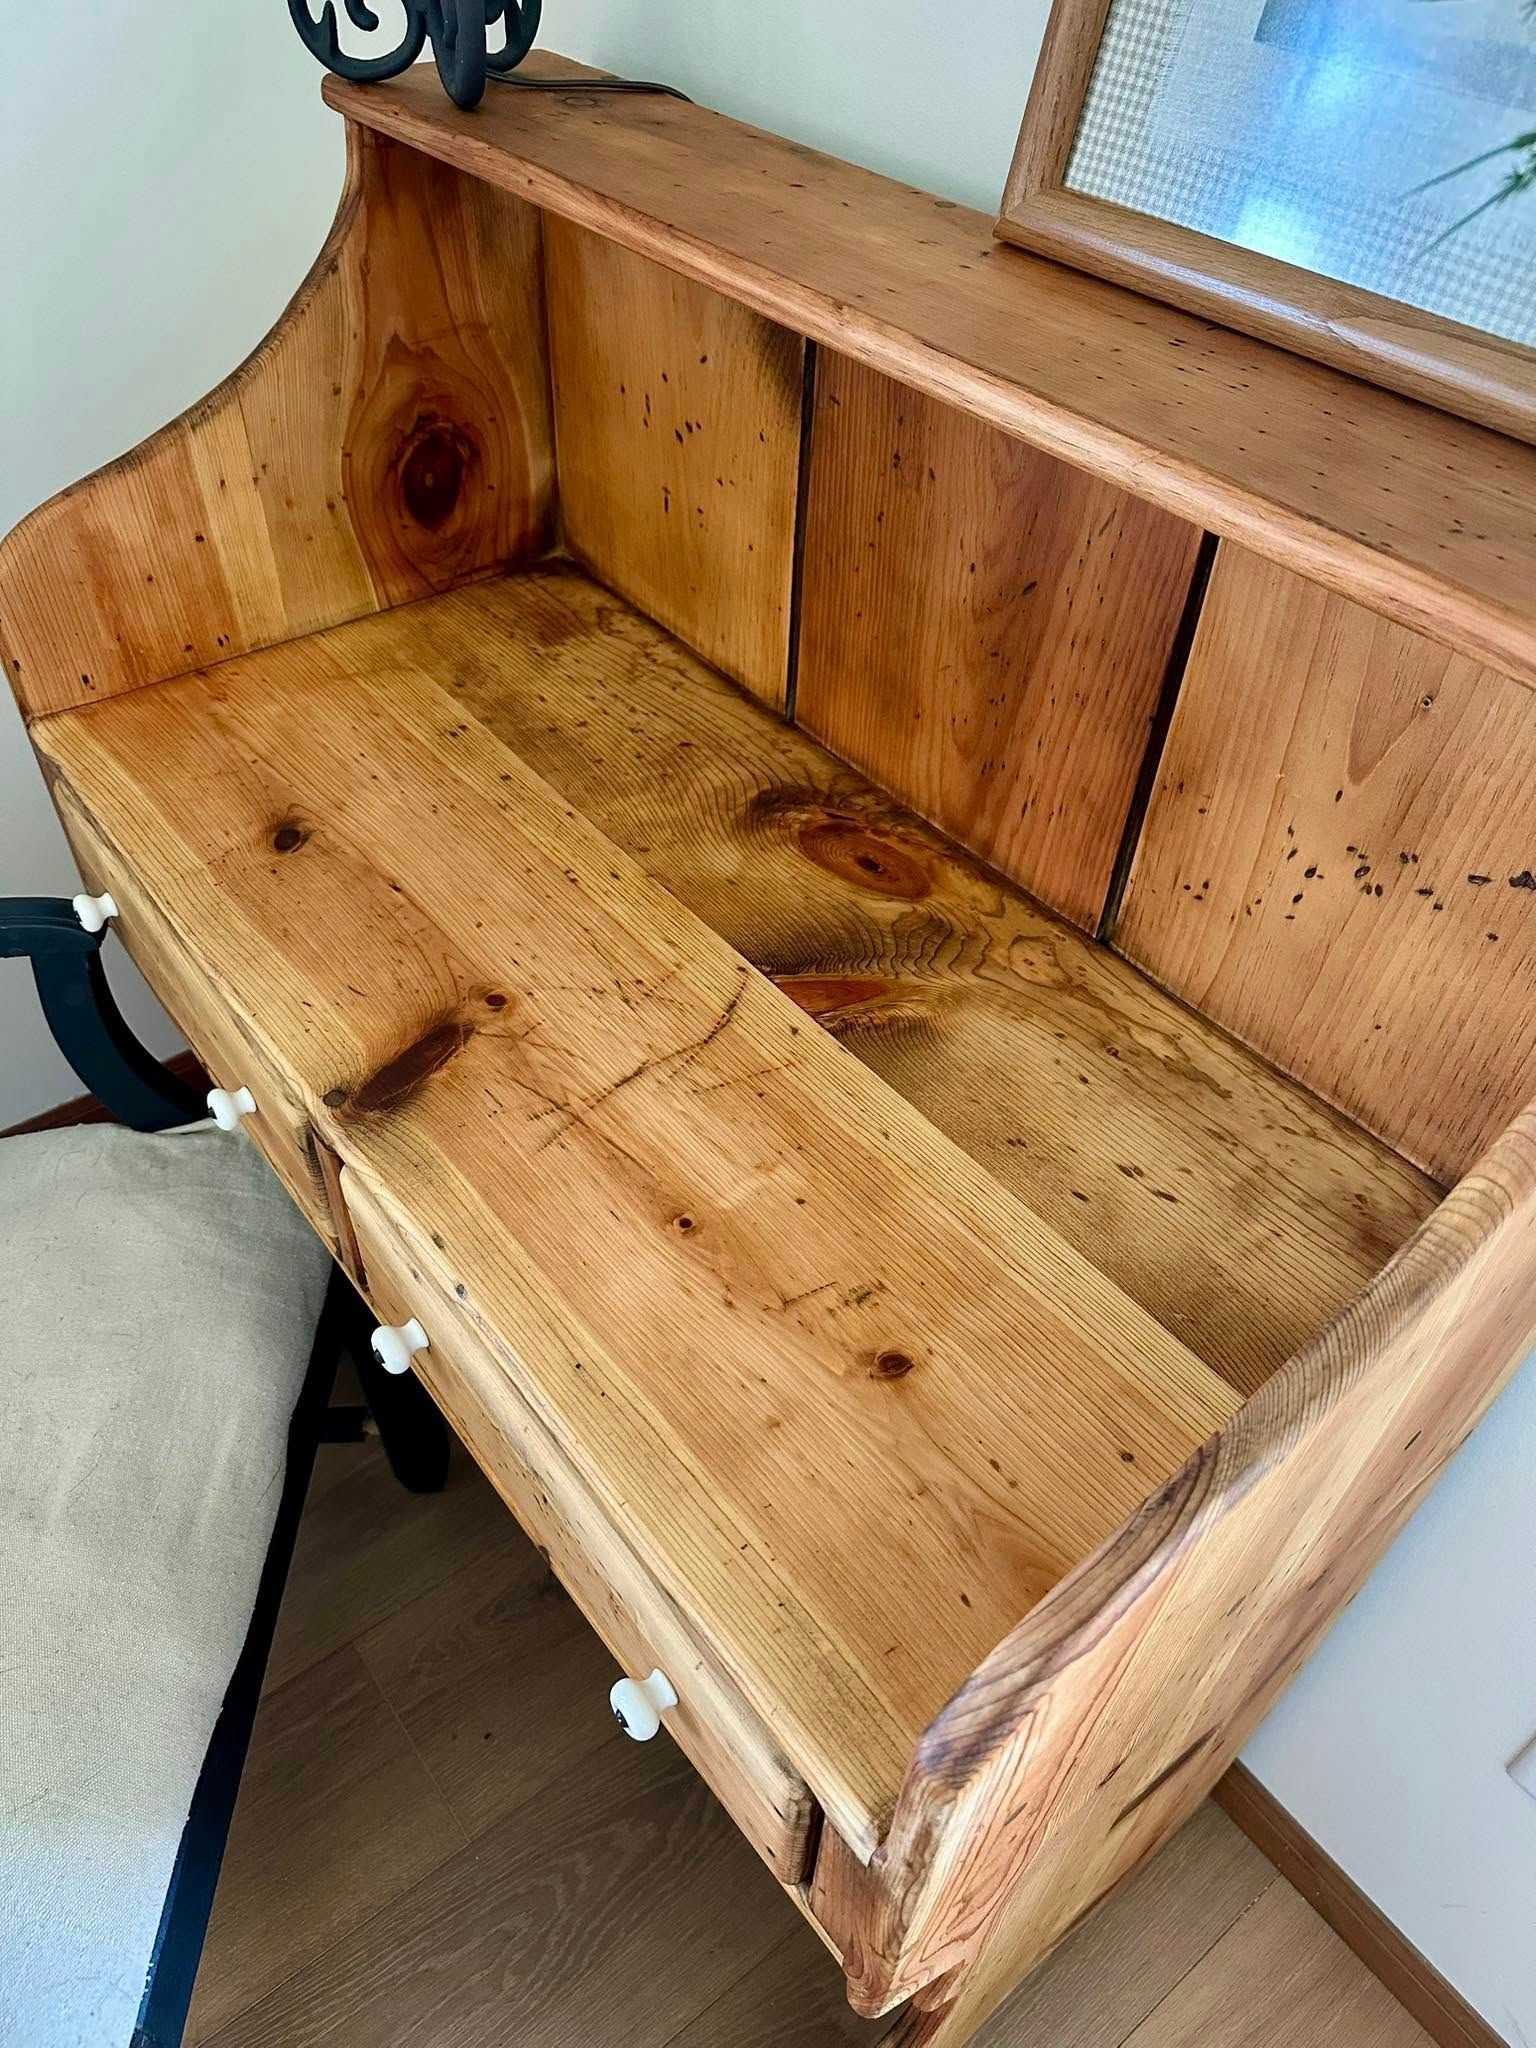
Pine Desk
This charming pine desk was the perfect way to start my 2025 season! Refinishing wood is a labor of love, although there is no better feeling than when you stand back to admire what you just spent days and hours working to achieve. Interested in what products I used or how you can recreate the look? Read on!
Easy to follow step by step guide
-
CleanList Item 1
Clean your piece using a cleaner that will cut through grime and grease. This one is affordable and multi-purpose!
-
StripList Item 2
My goal was to lighten the wood, therefore, I chose to remove the existing finish with a chemical stripper. There are dozens of chemical strippers you can find at any hardware store. Just be sure to read warning labels. You might want to consider if you can use the product indoors and what ppe items are required.
I applied the stripper with a chip brush and removed with a metal scraper. Lastly I sprayed on strip and clean to remove any excess product left behind.
-
SandList Item 3
Using an orbital sander, I sanded the entire piece using 80 grit followed by 120 grit. After sanding, I used a shop vac on the blowing feature to blow off excess dust. Lastly, I used a dry clean microfiber cloth to wipe the entire surface down to ensure there are no remaining dust particles.
-
ProtectList Item 4
I opted for a furniture wax finish. I used my wax brush and lightly applied furniture wax. After about 15 minutes, I went in with a microfiber cloth and buffed out the extra wax working in a circular motion.
Exact products I used on this project:
- Krud Kutter
- Microfiber cloths
- Orbital Sander
- Sand Paper
- Soy-based chemical stripper/Cleaner
- Metal scraper
- Wax brush
- Furniture Wax
Some of the links on this site are affiliate links, meaning if you click on them and make a purchase, I will earn a small commission at no extra cost to you.